Having a professional website for your business should be a top priority when you’re a freelancer. This 5-step guide for beginners will teach you to create a nice-looking website to impress your customers.
Bill Gate’s famous line ‘if your business is not on the internet, then your business will be out of business‘ may have become sort of a cliché, but there can be no doubt the sentence holds true.
The importance of having an online presence has never been greater. Nowadays, when people need something, they use the internet.
I have previously stressed the importance of understanding from day 1 that you, as a freelancer, are running a business. It doesn’t matter whether you’re a sole trader or a limited company, you professional activities should be treated as a serious enterprise.
Today, running a business and being on the internet are indissociable. You need a website. It’s also the perfect way to present your services and showcase your skills to potential clients.
In this post I will explain how you can do that in just 5 major steps. You don’t need to know how to code nor have any web design skills – there are plenty of affordable tools on the market that do most of the hard work for you.
As an extra, I will also include an all-in-one solution – in fact, you can jump straight to that by clicking here if you prefer to pay a bit extra for a simpler alternative.
Without further ado… let’s get started!
–Step 1–
Understanding How Websites Are Put Together
If you know absolutely nothing about website creation, having a clearer understanding of their different elements will make things easier down the line.
There are 3 main aspects of a website (kind of like a 3-piece puzzle):
- the domain name
- the web host
- the website builder
The domain name is just your site’s ‘address’, i.e., the name that you type into your browser in order to enter a website.
Example: You need to type www.google.com in order to visit Google. That’s Google’s domain name.
The web host is the service that allows you to store your website in order to make it visible to the public. Quite literally, you pay your web hosting provider to ‘host’ your site: they provide you with the ‘space’ where you can build it.
The website builder, or website creation platform, is the platform in which you make the actual website. It gives people like us – who know nothing about code – the necessary tools for that in a visual, more intuitive interface.

Let’s use an analogy to make things clearer. Think of your website as a house you want to build. If so, it follows that:
- the domain name is the ‘address’ or ‘location’ of your future house.
- the web host is the ‘land’ upon which the house will be built.
- the creation platform is the ‘construction materials and equipment’ to build the house.
The 3 need to be linked to each other – they are the main components you need to put together in order to create a functioning website. All that should become clearer in the steps that follow.
–Step 2–
Buy a Domain Name For Your Website
Let’s start by the most basic element of a website: the domain name.
As explained, the domain name is the ‘web address’ that people type into their browser’s URL bar in order to enter a website. For instance, the domain name of this very same blog is translationandinterpreting.com.
More examples of domain names include:
- www.google.com
- www.wikipedia.com
- www.britannica.com
- www.gov.uk
And so on…
Basic domain names ending in .com or .net are generally quite affordable, costing about £5-£15 per year. That’s also the approximate cost of a .co.uk domain.
Needless to say, you may only buy domains that have not been purchased by somebody else yet. A domain name that has already been taken won’t be available to you.
Some free online website platforms offer you a domain name without any costs, but keep in mind these are always somehow ‘built-in’ to their own. For instance, if you decide to make your website through Blogger you will pay nothing, but your domain will always be something along the lines of yourwebsite.blogspot.com.
It’s always best to just make that small investment on a domain, as it gives your business a professional look and allows for more branding potential. It surely will make a better impression on your customers.
The domain name provider that I use is Namecheap – as a matter of fact, I’ve been using them since 2012.
Their prices are very competitive and their support team has always been extremely helpful every time I had to contact them. An SSL certificate – an encryption protocol that moves your website from HTTP to the more secure HTTPS – is also included on every domain purchase.
You can buy a domain at Namecheap starting from $0.99, although it’s probably best to stick to the most common ones – .com, .net, .org, or even .co.uk if your business is UK-based:

Searching for an available domain name is quick and easy, just type the domain you want to buy on Namecheap’s search bar and click Search:

Should your domain come up in the results list as being ‘available’, all you have to do is click Add to cart and take it from there:

Another widely-used provider is Bluehost, which I’ll cover on step 2. I have only used Bluehost for web hosting, but they do also offer a domain name service just like Namecheap – so it might be worth comparing both options and decide which one suits you best.
Some additional tips when you buy your first domain:
- Keep it short and simple
- Use letters only (avoid hyphens and numbers)
- Stay away from trademarked names
- Remember to renew the domain every year (or buy it for a longer period of time)
–Step 3–
Buy a Web Hosting Plan
Buying a domain, although essential, is just the easiest step.
The domain name is pretty much just an ‘address’ for your website. Think of it as your website’s ‘GPS coordinates’, it’s the directions you give to people so that they can find your place.
When you first purchase a domain, if you type it into your browser’s URL search bar, it will lead you to nowhere. To use the GPS analogy again, the ‘coordinates’ will be taking any potential visitor to an empty plot of land – nothing has been built there yet.
You bought the right to use that ‘location’, so you need to put something there. What you need now is a hosting plan.
If the domain is the ‘address’ or the ‘coordinates’, the web host is the actual plot of land on top of which you will build your house (or, should I say, your website.) When you pay for a web host service provider, you are essentially ‘leasing’ that piece of ‘land’.
There are plenty of options when it comes to choosing a web host for your website. Namecheap themselves also a hosting plan, so you could potentially simplify everything by having both the domain and the hosting plan in the same place.
Bluehost offers some of the most comprehensive hosting plans on the market, and you may also use it for both the domain name and the web host. It’s a particularly good provider for websites created with WordPress (more on that in step 4.)
Their Basic plan gets you covered for 1 website (up to 50 GB SSD of storage space) and includes 24/7 support and a 1-year free domain. It also comes at a discounted rate for a 12, 24 or 36-month term (e.g., the 36-month term comes at a reduced monthly cost of £2.96 for the duration of the initial term.)
If you intend to create more websites, then the best option would be the Plus plan, which comes with unlimited SSD storage for an unlimited number of websites at £4.45/mo for the first 36 months (if you choose the longer plan.) It’s ideal if you have multiple businesses, or simply if you just want to create additional websites for, say, your personal hobbies.
Note: If, like me, you have your domains stored in one place and your web host elsewhere, you need to point your domain’s DNS to your web host in order to make the website work.
–Step 4–
Choose a Website Builder
Now that you’ve got both your address (domain name) and your plot of land (web host) sorted, it’s time to build the actual house (website.)
To build a house, you need tools and construction materials. In our analogy, that corresponds to the website builder or website creation platform.
The most popular website builder, and arguably the most powerful, is WordPress (not to be confused WordPress.com, which is its most basic, considerably limited version.) It is an amazing open source tool for website creation – and, in my opinion, an absolute ‘miracle’ for the ordinary internet user.
The fact that it is open source is the main reason why it is so powerful. Thousands of independent developers around the world create new themes (layout templates) and plugins almost every day. Thanks to that, there are very few limitations as to what you can do.
You also don’t need to pay any extra to use WordPress – the tool itself is free to use.
There are some premium themes and plugins that come at a cost, but they are fully optional and there’s a wide range of free alternatives to choose from. In reality, you only have to pay for the domain name and the web host, which have already been covered in steps 2 and 3.
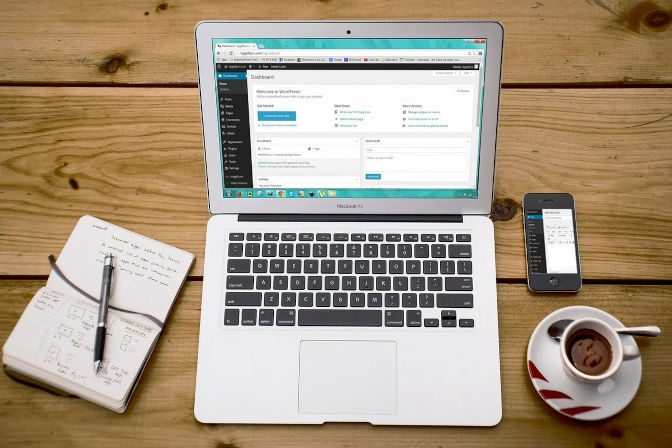
When you install WordPress to your web host (which can easily be done in just a couple of clicks with Bluehost), you gain access to your WordPress dashboard and you can immediately start building your website:

Do keep in mind there’s a bit of a learning curve at first, but from my experience that initial effort is totally worth it. The fact that WordPress is by far the most widely-used content manager system in the world, with an estimated market share of almost 40% (Source: W3Techs), is no coincidence.
–Step 5–
Build and Maintain Your Website
Once WordPress is installed in your web host, you can finally start building the actual site.
The main elements to website creation via WordPress are:
- Settings
- Theme
- Plugins
Another extremely important aspect you should never overlook is your website maintenance, which mainly consists of:
- Updates
- Backups
- Security
Settings
This section allows you to choose your site title, meta description, default language and other broad features.

Many of these elements are relevant for SEO (search engine optimization) purposes, i.e., to help getting your website indexed and ranked in search engines such as Google, Bing and so forth.
Themes
A theme corresponds to your website’s design, or in other words, it will determine how your website is going to look.
Each theme can be understood as a ‘design template’. There are thousands of themes to choose from, all of which are easy to install:

The way your website looks is extremely important, so it’s worth investing some time going through the available options. There are plenty of excellent free templates, so I am sure you will find something that suits your business’s needs.
There’s also a vast number of premium ones. These often have the advantage of being more powerful and intuitive (although that isn’t always necessarily a rule.)
A company from which I have purchased themes a number of times is StudioPress (including this very same theme you are seeing right now.) They offer some of the best on the market in terms of functionalities and ease of use.
StudioPress are the developers of the Genesis Framework, which is an intuitive and optimised structure for WordPress themes. They’ve made this framework available to third-party developers, so there’s an even larger range of amazing Genesis-based themes to choose from.
Plugins
Plugins are WordPress’s pièce de resistence. Their role is to expand your ability to do things to a website by adding new functionalities to the dashboard. You can see them as ‘keys’ to open new doors or as ‘power boosts.’
If there’s anything in particular you want to add to your website, chances are there’s a plugin for that. You can search and install new plugins in the below section:

Generally speaking, the more functionalities your theme offers by default, the least amount of plugins will be necessary to build a website that suits your exact needs. Still, installing a couple of them ends up being necessary to virtually everyone.
Example: If you’d like to add a contact form to your website, there’s tons of plugins that allow you to do that.
Just like with themes, there are both free and premium plugins. There are also several ‘freemium’ plugins, which allow you to use some of their basic functionalities free of cost, but charge you a fee (either recurring or a one-off) to give you access to the full tool.
Note: It’s perfectly possible to run a good professional website without buying any plugins, as there’s enough free options for that (just consider donating a few quid to the developers once in a while, they deserve it!)
Updates, Backups and Security
If you decide to use WordPress to build your website, it’s important that you take care of its maintenance.
Themes and plugin developers, as well as WordPress itself, release new updates on a regular basis, and it’s important to always have the latest version installed for security and performance purposes.
As a matter of fact, ideally you should avoid installing or keeping plugins and themes that are not updated by their developers often enough.
After 2 years without any updates, WordPress regards them as ‘abandoned’. Such plugins and themes are not keeping up with new WordPress releases, which may open room to security issues.
You should also carry out regular backups so that you can recover your website should a catastrophic event take place (they DO happen, trust me!) A backup before any updates is also recommended. There are plugins to schedule and automate backups, so that should definitely help.
In addition to backups and keeping themes, plugins and WordPress up to date, you may also want to reinforce your security by installing a couple of additional plugins.
Defender Pro by wpmudev is a good example. It’s a freemium plugin that costs around £14/mo for full access, although it’s worth installing it even if you decide not to use its premium features (their free functionalities alone are already a considerable improvement in comparison to doing nothing.)

It’s a sad reality, but thousands of websites get attacked every day. Hackers don’t care about who you are, how big is your audience, nor do they need a reason to ruin your hard work. Just do everything you can to increase your level of security regardless of how and where you build your website.
–Bonus–
Bonus: All-In-One Platforms
Now, you may have come this far in this post and be thinking ‘this is all very nice, but it just sounds like too much hassle.‘
That’s fair enough. WordPress may be an amazing tool, but there’s a learning curve involved. And of course, you also need to set up the domain name and web host on top of that.
If you truly want the process to be as simple and straightforward as possible, you may prefer to go for an all-in-one platform.
The only platform that I have used – and therefore the only I can safely suggest – is Wix. It also happens to be one of the most popular services of its kind.

Wix offers pretty much all 5 steps above in just one package. You can buy your domain there, link it to one of their hosting plans, and use their incredibly intuitive website builder.
It’s perfect for small, ‘static’ websites, i.e., sites that have just a couple of pages and don’t need to publish new content on a regular basis – which should be enough to most freelancers. Wix themselves have showcased some website examples created via their platform, and there’s no doubt they look great.
It’s important to note, however, that Wix has several limitations when compared to WordPress. Some users end up switching to the latter anyway because there’s only so far you can go with the former.
Wix is also likely to cost you a bit more on a yearly basis, although that will depend on the plan you decide to go for. Overall, it’s an amazing hassle-free solution if all you want is one single, small website for your business.
Conclusion
Creating a website has become a relatively simple and affordable thing to do, all you need is the right tools and a bit of free time.
WordPress is by far the most popular way for ordinary people to create a professional and engaging site. The platform itself is free, so the only essential costs are the domain name and the web host.
Alternatively, you can go for an all-in-one solution such as Wix. Despite having its limitation relative to WordPress, it’s arguably the simplest way to create a website.
Please note there are other ways to create a website, including platforms other than WordPress and Wix. If you are not keen on these 2 options, it may be worth having a look around.
No matter how you go about, having a website should always be a freelancer’s top priority: it’s kind of a ‘second CV’ that allows you to sell your skills in a more engaging but professional way.
If you’ve found this post helpful or think it could be useful to a friend who perhaps is – or is planning to become – a translator or interpreter, please kindly consider buying me a coffee by using the button below:
I put all my heart and soul into the content I produce in order to help my fellow linguists set foot in the industry. Most of what I do is available to everyone for free.
Donating is 100% optional, but greatly appreciated. A short espresso will do! ☕



 How to Become Self-Employed in the UK (Step By Step)
